Saturday, December 5, 2009

450th Sentinel

33rd Recon Regiment, 762nd Heavy
Recon Platoon, Blue Squad; Ride #3


A quick post, I've gotten back into
some work on some armor and tanks
and before I dive into them I wanted
to spin up my skills and practice on
some Sentinels.

I do a brush base coat in German Grey
then tape off and do another coat in
Calthan Brown. When that's dry I
peel the tape and apply a coat of
floor wax, this is the base for my
decals and weathering. After I've
added the decals with Micro Sol and
Set and gave them another coat of
floor wax I do an oil wash with
black and burnt unber (deep brown)

When that is dry I do a "Ard Coat
or Dull Coat and then drybrush to
bring out the edges.


Sunday, November 22, 2009

Storm Family of Tanks. Part 2

Now that the gun housing is taken care of
I need to figure out how to swap the weapons.


This was not so hard to figure out. I attached a larger magnet on
the back side of the gun housing then to the weapon. I had to add
some scrap plastic to the two different weapons to mount the
magnets on.

Next is the "50 cal" mount for the Stormlord build in the rear. For
this I mounted small magnets on the side of the engine housing
and then on one of the 50 cal shields.


Friday, November 20, 2009

Storm Family of Tanks. Part 1

This weekend my LGS will be hosting a Tanksgiving and I've been asked
to bring some heavy metal. For this go around they will be in urban,
fresh from the factory camo gray ;)

The Stormlord and Baneblade kits are fantastic and I've really enjoyed
them. With the Stormlord kit it's possible to make six different
tanks; The Stormlord, Doomhammer, Shadowsword, Banehammer, Banesword and
Stormsword. The key difference is the position of the gun housing and
the gun make up.

With some cleaver use of rare earth magnets its possible to not glue
a couple of key parts for reconfiguring.

First off build the basic body and the crew/engine housing and any
other smaller pieces as needed like sponsons and smoke launchers.

Next I build the gun housing and attached magnets to four corners:


I also use some magnets on the body plate:


To make sure I get the correct position I use red paint to mark the magnets
and do a dry fit leave the paint there the second magnets will be glued:

Saturday, November 7, 2009

501st Ork Hunters "Black Blades"

As my IG army grows and grows I like adding some
of the new fantastic range of miniatures to it,
but I also like putting my own spin on them.

I primarily run Steel Legion, but seeing as GW
has a hard-on for Catachan's and Cadians they
get the new models leaving much of the other
IG range in the dust.

The nice thing about Catachan's is they also
fit into the fluff about Steel Legion Ork Hunter
from the Armageddon Campaign book.

So to include some of the new range of models
my 450th Steel Legion has attached some 501st
Armageddon Ork Hunters to help root some Orks
out of some ruined Hives and Habs.

First up is my Gunnery Sgt. Harker model, I loved
painting this model but part way threw it I heard
a voice in my head that said: "I pity da fool"
and from that I give you Sgt. B.A. Barachas


As game terms to he an his men will NEVER deploy via Valkyrie


To this unit I'm still adding a heavy flamer, vox op and Demo charge

Next up is the Colonel 'Iron Hand' Straken model, again a great model
but for the Catachan range, so now he's an Ork Hunter and will
be filling the roll of a shotgun wielding Vet Sgt.


This squad is also getting a heavy flamer, demo charge and vox op.

Friday, November 6, 2009

One step closer

I've allowed this Blog to trail off a little with a couple of post
that have NOTHING to do with Titans; I'm about to correct that.

Today I picked up an air compressor for my airbrush. I know that
the compressed air cans are not reliable enough for painting
large surfaces such as Titans.


I'll also be using this on my currently growing IG army which I will
post in a second Blog as to not bog this one down.

Monday, September 28, 2009

How the mighty have fallen

Thanks to UK Games Day we have been given a better
look at the upcoming Chaos Reaver Titan. I want
to thank everyone who went and supported GW/FW
and was able to snap some shots and I want to
thank www.warseer.com , the source of the photos.

One thing to notice, it looks like you can have
the titan close combat weapon on either arm,
how SWEET is that?


Sunday, September 27, 2009

What can Brown do for you?

While working on my Chaos Warrior army and
reading over the army book I started having
visions of Grand-Ole Pappa Nurgle and read
this his Mark of Nurgle is pretty nasty
so I worked some up.


So many armies so little time

I love Games Workshop games and hobbies, only
problem is I have so much of it. I had fully intended
to start my Titans by now, and I had sort of, but I
was side tracked by some Fantasy projects and of
course Space Hulk. So, I thought I would share
some of my fantasy work to let you all know I was
still kicking.


Not a fan of painting red so I know I did not do the best I could of

and the camera has shown me that. I will touch him up.


Monday, August 17, 2009

In Space No One Can Hear You Scream

I'm so excited, Space Hulk is making a come back
though limited in release its endless in scope.
This was the game that bridged the gap between
board gaming and miniature gaming for me when
I was young and pulled me head long into my love
of the Warhammer Universe and the hobby over all.

If you have had a chance to check it out run over to
the Games Workshop web site and order your copy
today...now..do it NOW!!!

Sunday, August 16, 2009

Evil Twins

Today was a happy day for Titan lovers. Games Day Germany showed
even more of the up comming Chaos Reaver Titan. Guess i should get
started on my first Titan before this one comes up for sale.

Saturday, August 15, 2009

Torn between projects

Its been awhile since I posted and I have no one to blame
but myself. I missed my deadline on starting my Titans
due to other unfinished projects. I really seem to have
a hard time staying on one project at a time. Since
starting my Stompa and Titans I've found time to
finish off a Land Raider Crusader and some Ogre Kindoms


Now that those have been finished I can re.....what was I saying?

Anyway, I've signed up to do two year long painting challenges one for
40K and one for WFB, sometime in between all that I hope to
finish off my Stompa and get to my TITANS!!!

Saturday, April 25, 2009

I want to paint it black

A few hours after letting the black dry I
took an old rag and gave it a wipe down.

This is tricky as that salt gets in some
hard to get places. But even the salt
I miss still "fits" with the model.

After rubbing the model down for awhile
I started noticing that I was rubbing
it off the rivets and edges so it is
also adding to the weathering that is
to come.


Paint it Black

I used some good sturdy auto body black primer.
GW primer is to $$$ to use to undercoat a model
this large.


I really like how the rust red shows threw in the
nooks and cranes. It already has some decent built
in weathering and shading and I've not even applied
paint yet.

Ork taste like chicken, just add salt

After the undercoat is dry (overnight) I borrowed
some of my wife hair spray. I'm bald so it's not mine.
After I sprayed the models with hair spray I broke
out the salt. On the larger parts one shot of spray
will not hold the salt so I did sections.


Friday, April 24, 2009

Is it rusty in here?

First coat of Rusty Brown to use a salt type paint job.
I'm going for a under coat rust look, hence the name of
the color lol.


Mek's been busy

With my Titan build-off days away I thought I should wrap up my Stompa build
or at least get it to a point I could pick at it during the build.

I got all the bitz and scrap I think any self respecting Mek would throw
on a Stompa.


Next up would be the head. The top turret is not glued on yet so I can
paint it on its own.


This is what it would look like with the head attached. At this time its
just sitting their for a picture.


I also left the arms off for painting. I'm thinking of using Mags to
make it easy for moving.

Sunday, April 19, 2009

Errr We Go!!

As well as working on my Titan I've also started a "little" side
project.

While I've had Ork armies off and on for the length of this game
I really never gave them much thought but with the release of
the Stompa I just knew that I had to build one if just for
modeling sake.

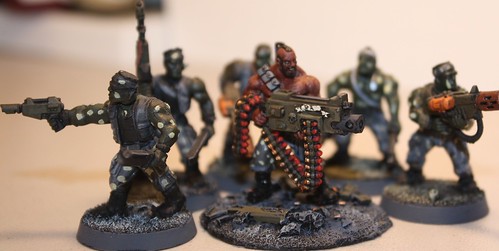
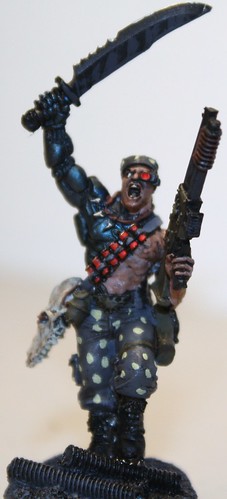
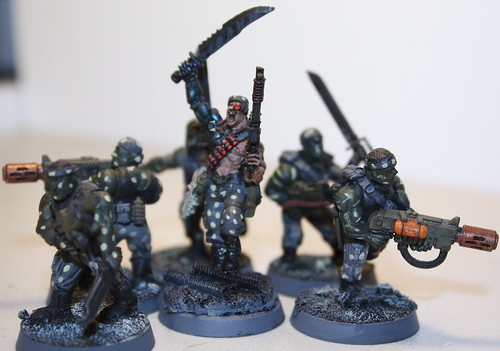
I've decided to make this an FreeBootez type Stompa with
a pirate theam and will use Ork Kaptin Badrukk as my force
leader.

Did some work on it, I wanted to be abit further before I
started my titan but my work schedule has me bogged down.

I decided to put it together in stages and keep it apart
until I get a change to get it painted.

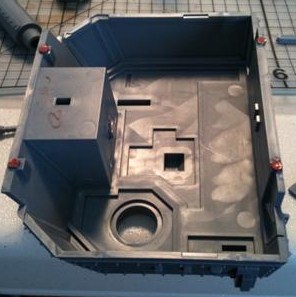
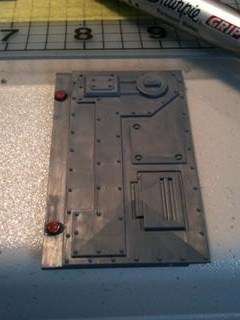
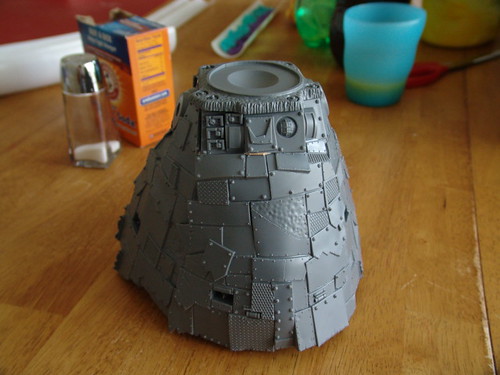
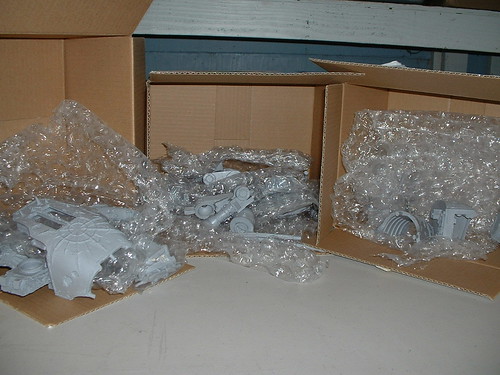
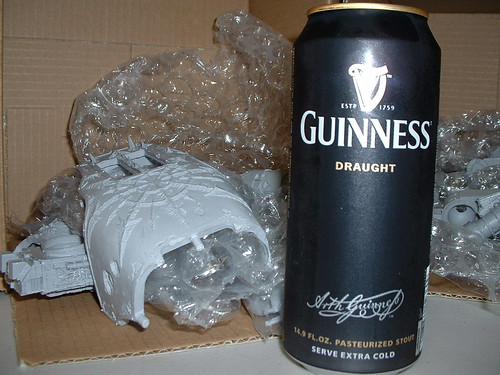
I started off with the body. Its five pices that fit pretty
easy once you move it around for the correct fit. I used
plastic glue which gives you some play, once I got the pices
to fit I used Zap-a-Gap on the inside to secure the hull.

I also used rubber bands to hold it secure until the glue
was dry, as you can see part of my rubber band became glued
to the hull LOL:


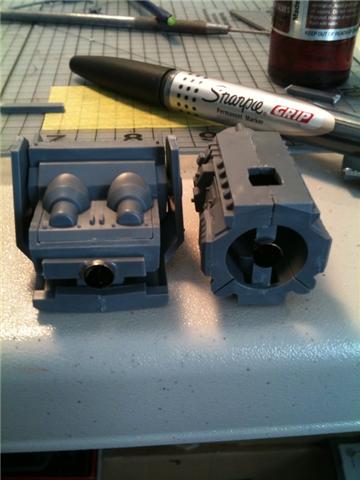
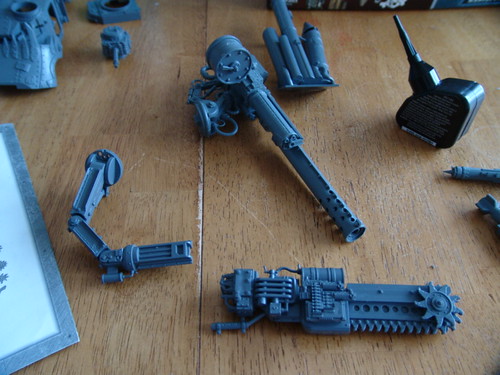
Next up come the stages I was speaking about. I constructed
the pipes and weapon arms. At first all the tubing is a
little daunting but really once you figure out the system
its reall well done.


I did go ahead and attached the pipe works, I fell it
pull the model together a little better when i start
painting it.

NOTE: The directions that come with the kit are well enough
but I had to use a combination of the directions and the
White Dwarf edition that highlighted a Stompa build to make
sure I was getting it right, I also refered back to the GW
web site for build information and I still got some
bits backwards like the shoulder gun that looks like a
killa kan.

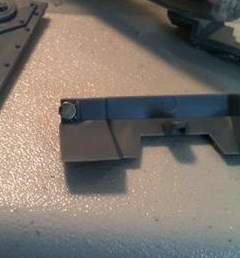
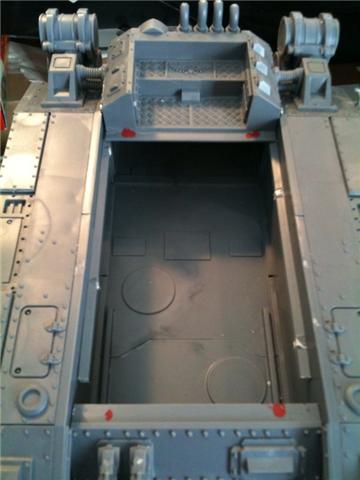
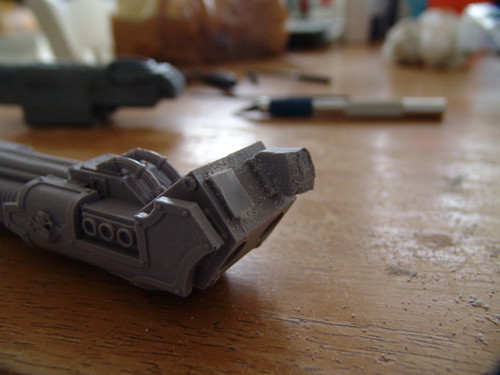
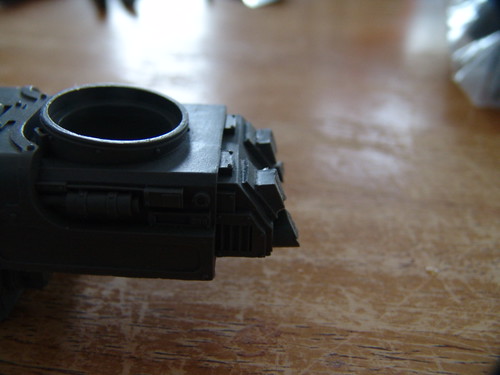
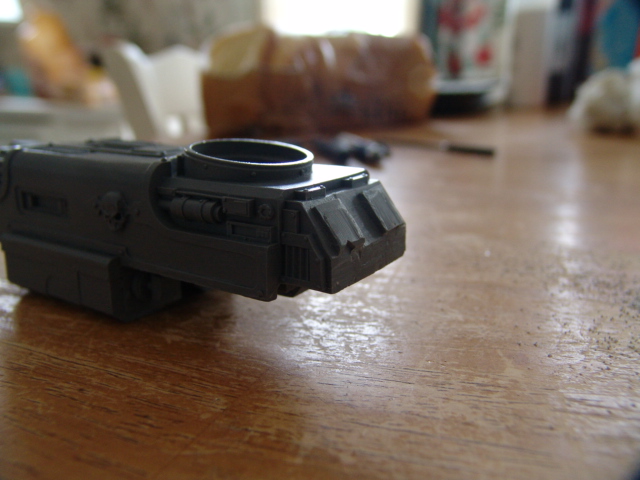
Next thing is the head. I HATE the head as it comes in the
box, it looks to small and squad to be the command post for
anything that size. I took some insperation from the White
Dwarf and saw that someone used the front end of a Ork Battle
Wagon and love the "jaw" look of it.


I'm going to try the "salt" method of painting on the stompa,
I figure an Ork stompa is one place I can try risky stuff.

J

Time is ticking

Well time is counting down to when my friend Joe and I really dive
into our Titan project. Getting a litte bit of a head start and
am starting to clean and trim off the extra bits.

I did not get to far before my wife kicked me out of the kitchen
because it was close to dinner time but this is what I did get
done. First off I look over model checkin each part for warping,
damage and over all condition. Its a good thing because I am
missing the brass eched vents for the top but a quick email
to Forgeworld took care of that and they are in the mail.
No bad warping or miscast that I've noticed yet but I'm just
getting started and while I will give it a good cleaning I did
not notice much release agent on the resin.


I did start cutting on the Mega Vulcan bolter and the Plasma
Blast gun before I was "asked" to remove my crap from the table lol.

Some of the vents are pretty easy to pick out:


Others are not so easy to see:


After finding the vents and cutting I like giving them a quick
sanding to smooth them out:


Thats about as far as I got, but I will be back it soon. Any
Advice or tips are welcome

Jon

Sunday, April 12, 2009

"The Usual Suspects"

SO Big Jon tells me the first step to approaching a big project , like a titan, is checking to see all the parts are there, and giving everything a good scrub to get off the mold release. I decided to set part of Easter Sunday aside for this task. My wife and I went to Mass (we're Catholic) Saturday night, because two of are good friends were being confirmed, and I was, in fact, one of the sponsors...
The service was 3 hours long (gotta love the Catholic church),and all of our butts were extremely sore afterward. The solution...lets go to the local Irish Pub (Kelly O'Niels), to celebrate! Big Jon can tell you more about our history with Kelly O'Neils...

Fast forward to this morning (I say fast forward because things are kinda blurry from last night), and I wake up at the crack of 12, instead of 9, like I'd hoped... Lets just say, I'm not in any mood to catalog Titan parts, and scrub...
Maybe you can help me....Here's a pic of my titan so far. Do you see anything missing? I'm deeply sad about not getting more done this week, but I did manage to catch a snap shot of the culprit in action....maybe I'll get more done next time...


Tuesday, April 7, 2009

IG uses Troops? Since when?

An IG army is nothing without the grunt to do the grunt work.

With the new system troops are our friends and with IG you
can't have enough.


I tried to take the colors more from an American WWII
stand point instead of the typical Armageddon Steel
Legion and the current German WWII influnce used
heavly in Death Korps. I do like using Model Colors
as they are perfect for that WWII look.

My second set of troops.


And my HQ to lead them.


So, its not much but its a start. I do have a few more
done and will post them later.