Wednesday, August 4, 2010

Prime Time

Not to much to update, work has been keeping me down,
but if its was not called work it would be called play.

Anyway, I've gone ahead and primed the major parts of the
titan and added most of the smaller detail. I did this
in order to be able to start painting the inside detail
before putting it all together.

I hope to add some more updates this weekend.

Monday, July 26, 2010

Getting the colors right

Taking a small break from the building to figure out the painting.

I used one of my "extra" parts FW sent for a test run. Pretty happy
with it so far.

IMG_0342 - Black Auto Primer

IMG_0343 - Armypainter Silver Spray

IMG_0344 - GW blue wash on Chaos, P3 Blight Gold on trim

IMG_0345 - GW Mud wash

IMG_0346 - GW Chestnut ink in damage areas

IMG_0347 - GW Black Wash

IMG_0349 - Floor Wax seal wash

IMG_0350 - Windsor Oil Brunt Umber wash

IMG_0351 - Windsor Oil Black wash

IMG_0353 - Dull Coat and some blue highlights on the chaos star

IMG_0354 - Some MIG Gun Metal run around the edges, a little
more blue and some flesh added to damage area

IMG_0356 - A side shot.


Sunday, July 25, 2010

Get up - Stand up

A quick look, standing on his own two feet.


The legs are NOT glued in place, held in with the brass rods
I'll get a shot of the legs pulled out later, I still have some
pinning to do for some extra support.

Saturday, July 24, 2010

She's got legs

Ok, so I got to the legs. It did offer me a slight challenge
because of the elevated foot. Keeping the hip move level
so the whole model does not look like its tipping over was
always on my mind and I did a lot of dry fitting.

So, on a double take I removed the screws from the feet.
I did this so I could use brass rods to help secure the
legs to the feet.


When picking the angle of the three leg parts kept me busy unit
I threw in the towel and went with what the front and rear
pistons would allow. On one note, it seems thy loyal servants
of the corps Emperor slipped in a "clean" part in hopes to weaken
my Titan.

Magnet time

Before I get to the legs I went ahead and used magnets on the hip and
upper torso. I cut the hip's torso mounting "disk", after cutting it
scorch it with a hobby knife to give the green stuff some extra
surface to grip. Also, make sure you don't flip the magnets.


Thursday, July 22, 2010

Lesson Learned

Never let it be said that I don't learn from past mistakes.

On my last Titan build I had a hard time with the toe pistons
being to short on a couple of toe's. With this in mind I
headed down to the local Hobbytown and picked up a bunch of
different sized brass rods, and good thing because my gripping
foot's middle toe's piston was much to short - brass rod to the
rescue.


I've pinned the hip ball joints to the upper legs. I hope to
have the legs done this weekend, but its the wife's birthday
weekend so I'm not sure how much I'll get done.

Tuesday, July 20, 2010

These shoe's were made for walking

Well a little late is better then never. So in dealing
with the position of the feet I've settled on the foot
location. To ensure no slipping I decided to screw the
foot base to the ahmm base. This will also allow me to
do less pinning on the toes since the titan will be on
a platform.


I was able to screw the first foot directly into the
wooden base but the second foot being so high was only
able to be screwed into the rhino. I'm going to do some
additional pinning of the toes to the base.


With the feet secure to the base I set the toes in place.
The rhino foot is in a gripping position pose while the foot
in the crater is in a support position.


Next up are the toe pistons. Next question is do I go
ahead and paint the base/feet now or wait until I have
the legs attached?

Monday, July 5, 2010

What ya doin with your feet son?

Ok, back to my Warhound. I've got the base secure to the wooden base. Even with the resin epoxy I still had to use two wood screws on the corners to force it to lay flat because of a bend.

Now I've been working on foot position.

I think I'm going with something like this:


Trying to decide if I should go with a static foot position or an
action foot position.

I like the static because it provides me a more stable base but
the action position seems more "hunter" like. I'm open to
suggestions.

Panthers in the mist

Well my break from my Warhound paid off. Seems FoW is really picking up steam in my area and since I posted a couple of WIP's I thought I would show how they turned out.


Tuesday, June 22, 2010

A break from the norm

So I had my friend come visit me from Hawaii for the weekend, his name is Joe and he helps motivate me to stay on top of my painting and is one reason I started this blog so he can see that "yes" I do paint sometimes.

During this visit Joe decided it was time for me to break out my airbrush since I've yet to use it. He helped me mix the paint, not to hard as we were using Vallejo Model Air.

For the test subject we decided to use some Flames of War late war German Panthers.
Flames of War is a great break from the normal 40K/WFB I've been doing and
was fun to do.

Now these shots are WIP's since I still need to add the decals and some weathering but the airbrushing is done.


So now that I'm no longer an airbrush virgin and don't know why using the
airbrush was so scary I hope to be playing with it more and more.

Wednesday, June 16, 2010

Back to basics

Good news, I received an email from Forgeworld and my replacement
part is on its way. I must say Forgeworld's customer service is head
and shoulders above most companies I have dealt with.

So, while I'm waiting on my replacement carapace I'm going to start
on the base and feet. I will not take all the credit for being original here
and am borrowing an idea I found on the internet.

I'm taking hints from "Khain" on the "40K Online" forum
http://www.40konline.com/community/index.php?topic=171509.0
for my base work.

I'm using Games Workshops Battlescape scenery as my base, but I also
need a wooden base to secure it together. Once again a trip to Walmart
produced an 8x11 bamboo cutting board that's perfect.


I use some Gorilla resin epoxy, clamps and rubber bands to secure it over
night.


and now I have my base.


Now to fill in the edges with some putty and I'll start mounting the feet.

Tuesday, June 15, 2010

Chaos God of Miscast

*sigh* in my cleaning of my new Titan I found a hollow section in
the rear of the left carapace. I sent Forgeworld a nice email with
attached photos of the issue. I hope they can send me a replacment
or at least let me buy a replacment part.

If they can not help me I sure can use some advice, my green-stuff-fue
is weak.


Monday, June 14, 2010

Bath time

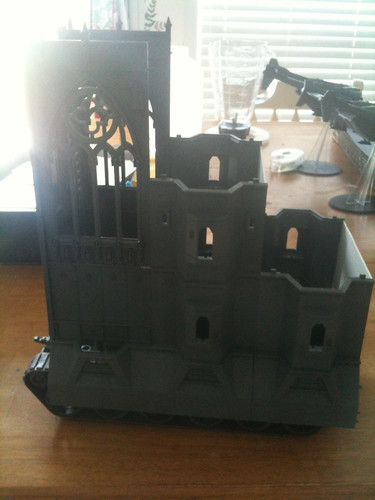
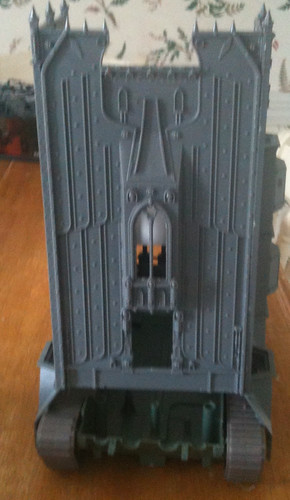
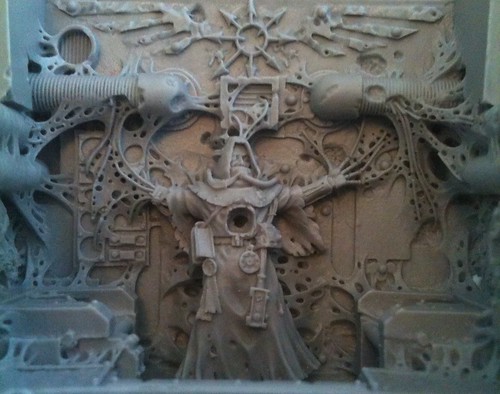
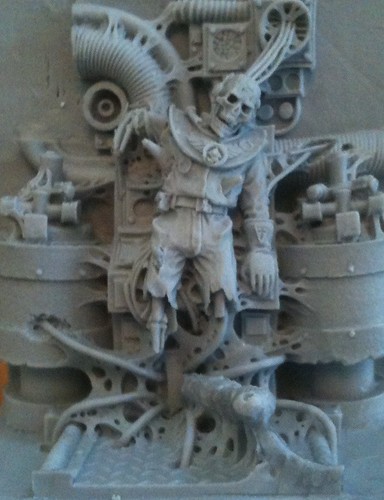
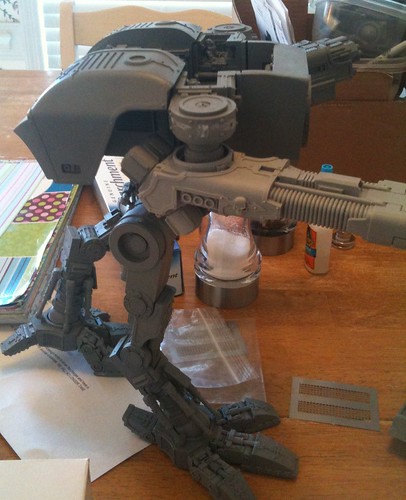
So, its time to get back into my Titan fever. I've been holding onto
this Chaos Titan for a couple of months since sending off my
Imperial Titan.

I'm going to go just a little slower on this one because of other
projects in the works and the time of year, I have some vacation
time and some friends visiting me this summer, this does not
mean I can't prep.

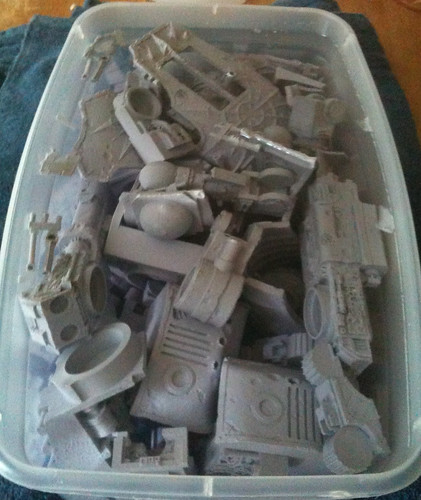
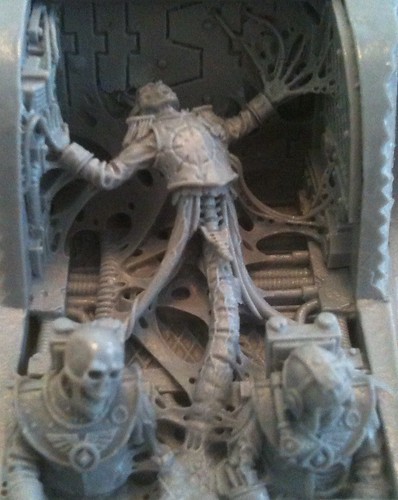
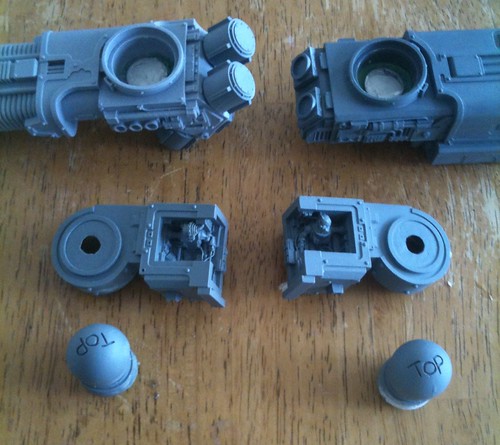
Of course, if you have ever dealt with resin you know you
must clean it.


I use a mix of warm water and Super Clean I picked up from
Walmart, its a degreaser so it works very well and does not
harm the resin. I let it soak over night then using an old toothbrush
and the sink I scrub each part and wash it off.

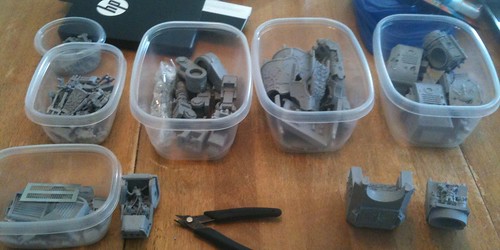
I then lay the parts out for some air drying.


At this point it was off to work and later in the evening my wife
bunched it all up for me and put it in a plastic storage bin for seperation.

Sunday, June 13, 2010

Something big

While digging in some bitz box's and check out some unopened
terrain I decided on making an Imperial Leviathan to go along with my
project ADD. So far using two Bastion’s and a Shrine of The Aquila and
a set of Wal-Mart, bottom-shelf toy tank treads I have the makings of a
decent mobile command post for my Guard/Titans for my APOC games.

I still have a lot of work to do on it and right now its a battle with
time vs. my computer gaming collection ;)

But as I progress I'll be sure to post some WIP's as its not even in
decent WIP condition other then what you see.


It came from below

I've not been super busy posting but that does not mean I've not been super busy ;)

I got my hands on 10 - yes I said TEN Armorcast Termites. Now I know they are recast and I did get a good deal on them. Half of them got used in an APOC game, noting like having 10 Vets pop out with flamers and melta's behind enemy lines.

I pointed them at 40 points a pop and deep stike them like drop pods. They also get a one time S4 AP- large blast if they come up under enemy models like the Tyranid model (his is a little stronger) who comes from below. I think it's balanced game play and it was well received by the other players.

Friday, April 23, 2010

I love it when a plan comes together

Sorry for the lack of updates right now but it seems I've
been dragged into an "Ard Boyz" tourny and have to bust out
some IG; which I'll be sure to post here. But, I do have a
plan I want to run by my kind subscribers (all 16 of you :D)

With my Imperial Warhound I was going for a free standing pose
for more game support, but for this Chaos Warhound I wanted to go
a different direction with a static base but still want to be able
to use it in games. Has anyone had issues with using based Titans
in games? This one I might just chalk up as a project for display
if the base becomes an issue.

Thoughts? Ideas? Comments always welcome.

Saturday, April 17, 2010

Beauty is skin deep

So I started working on my Chaos Warhound and man is it fantastic.
While I still plan on picking up another Imperial Warhound in the
future this was a great deal.

This Warhound has a little more release agent on it so I'm going
to have to be more careful scrubbing.

Will Hayes and Simon Egan (the sculptors) really out did themselfs
and I'm already looking forward to my Chaos Reaver.

Just some teasers.

Same as with the Imperial, I break it up into smaller "projects" to
keep track and make it easier to move it around the house.


Here are some detail images from the inside, by far the best part.


Thursday, April 1, 2010

Sea to shining sea

I'm happy to report that my Titan has safely deployed to the sunny shores of Hawaii and await the paint job it truly deserves from my friend Joe, one of the BEST painters I know. I would also like to let you know that my home has been corrupted with an evil foul Titan dedicated to the Chaos Gods. Its detail is amazing and I can't wait to get started on it, but I'm going to knock out a couple of smaller projects before I tear into it that I'll be sure to share.

Tuesday, March 23, 2010

Its all coming together

Well I finally finished up the arms.


I glued the arm's into the weapon mounts, when the glue had set
I drilled two pin holes that cross for extra support.


With both arms done I'm not able to attach the weapons:


With the arms done I'm not able to put the model together
for a stability test.

The torso's and arms are held on with nothing but pin's
and magnets at this point.


The good news is that I've gotten this far, the bad news is it goes in the
mail Saturday.