Well I have some decisions to make and am hopping
the 10 of you can help ;)
This titan, as well as my future titans will be both
display and gaming figures.
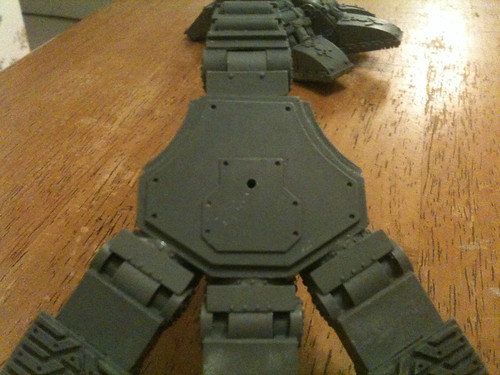
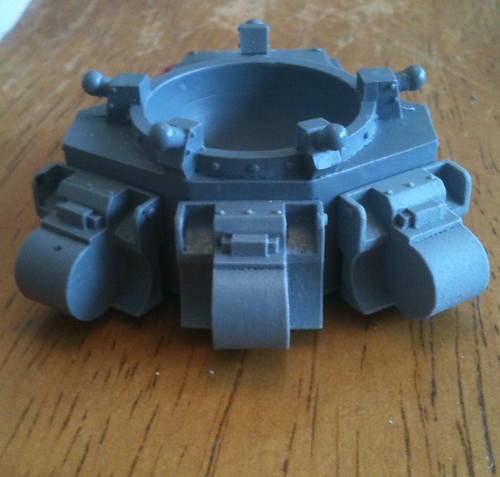
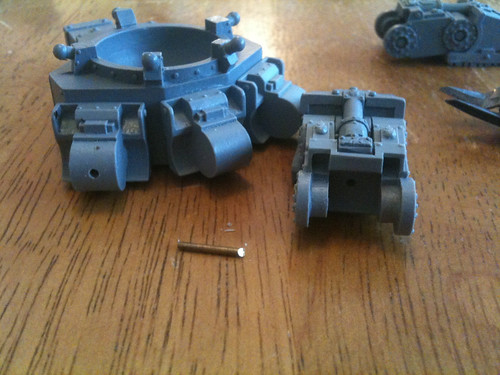
With this titan I want to use magnets on the torso,
head and arms. I had also thought of using magnets
to attach the top section together instead of gluing.
This would allow me to assemble the total model
and still break it down for transport and painting.
So, what do you think about using magnets to assemble
the upper torso?
Am I asking for trouble?

Friday, February 26, 2010
Monday, February 22, 2010
On pin's and needles
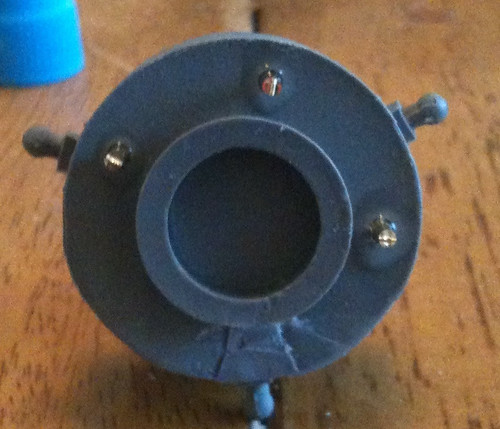
So, taking some sage advice I reinforced the pinning on the feet
and threw in some pins at the pivot/glue points connecting the upper
and lower legs.
I followed the "two pin" rule for extra support. For the leg pin's
after I drilled the hole and measured the pin I cut it just short
so I can fill in the top of the whole with some putty and smooth
the surface before painting.


On a person note its dang nerve wrecking to drill wholes into a
model like this, but I understand its for the better in the long
term.
and threw in some pins at the pivot/glue points connecting the upper
and lower legs.
I followed the "two pin" rule for extra support. For the leg pin's
after I drilled the hole and measured the pin I cut it just short
so I can fill in the top of the whole with some putty and smooth
the surface before painting.

On a person note its dang nerve wrecking to drill wholes into a
model like this, but I understand its for the better in the long
term.
Sunday, February 21, 2010
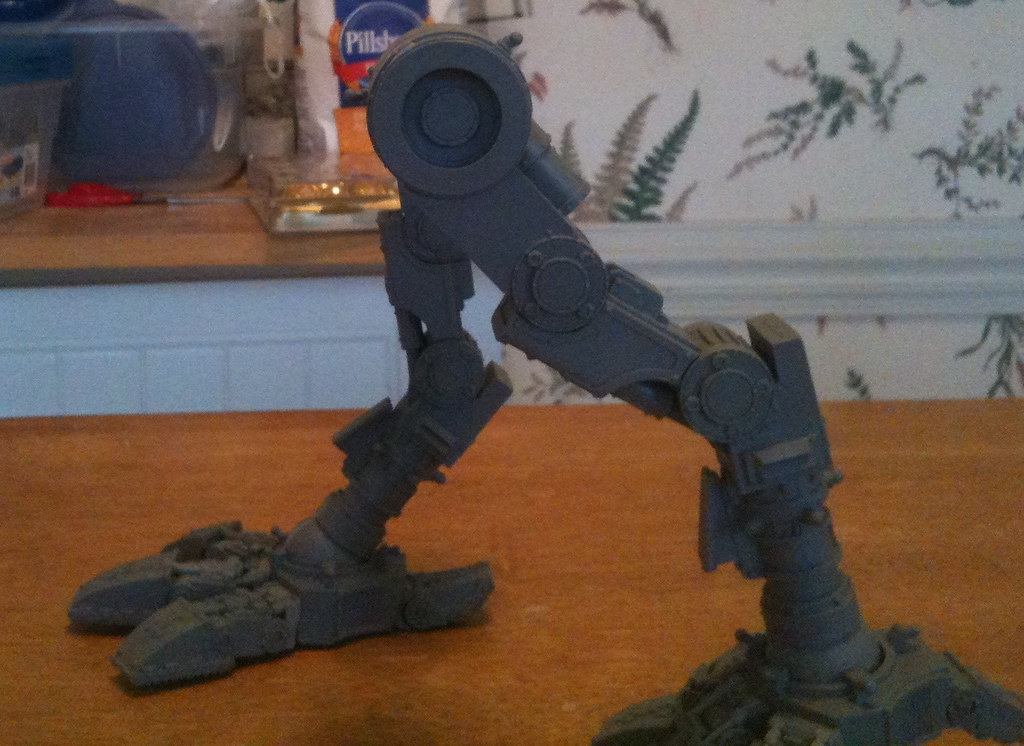
She's got Legs, she know how to use them!
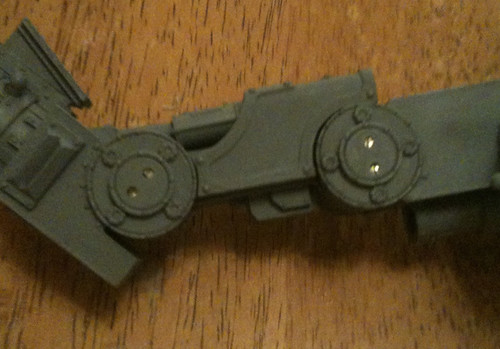
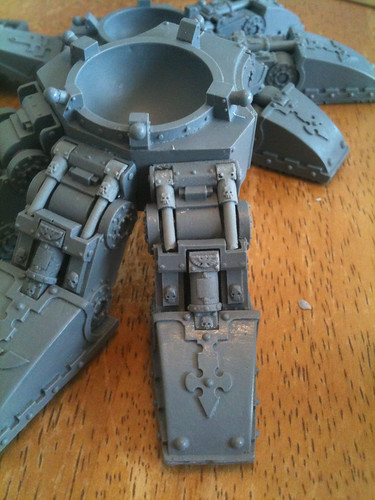
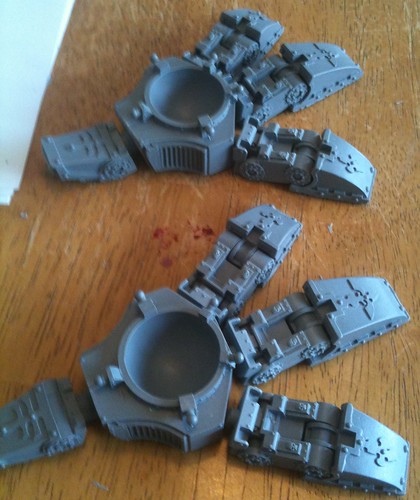
Well I finally finished up the legs to hip portion.
Pretty much the same as the legs, dry fit, dry fit
again, pin, dry fit and glue.
Careful with the legs, pretty easy to flip around
and turn backwards if your not paying attention.
To note, I switched to a electric dremel vice a
pin vice, careful, the dremel cuts through resin like
a hot knife.
I drove a pin threw the bottom of the foot into the
ball joint for some extra hold.

When building the legs I found it better for the over all
look to keep the hip joints roughly the same height, this
will keep your hip-to-torso level.

I decided to pin the hip ball joints to the legs since the weight
of the torso would be resting on these joints.

Once I attached the hip ball joints I check for alignment one
more time.


Pretty much the same as the legs, dry fit, dry fit
again, pin, dry fit and glue.
Careful with the legs, pretty easy to flip around
and turn backwards if your not paying attention.
To note, I switched to a electric dremel vice a
pin vice, careful, the dremel cuts through resin like
a hot knife.
I drove a pin threw the bottom of the foot into the
ball joint for some extra hold.
When building the legs I found it better for the over all
look to keep the hip joints roughly the same height, this
will keep your hip-to-torso level.

I decided to pin the hip ball joints to the legs since the weight
of the torso would be resting on these joints.
Once I attached the hip ball joints I check for alignment one
more time.

Monday, February 15, 2010
The Shoe is on the other foot
I started in on the other foot, I went out of town this
weekend so I could not work on it as much as I wanted to,
I also have a game of 40K next Saturday so we'll see how
it goes.
Well with this foot I kept up my pinning, but with the
angle I used I ran into pinning issues where I was drilling
into existing pins.
This was the toe pin:

So when I put this pin in I hit the toe pin:

To solve it I moved the center pin on the toe to the edges:

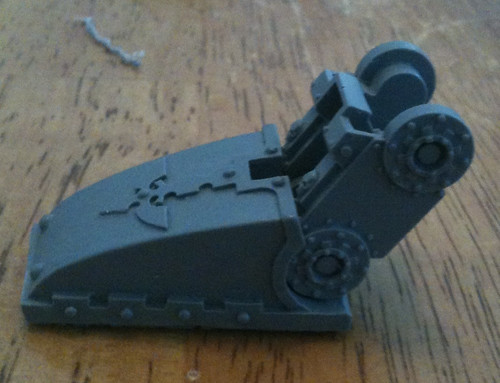
With the pinning worked out I could position my toes. Mind you that
a lot of dry fitting went into the planning.

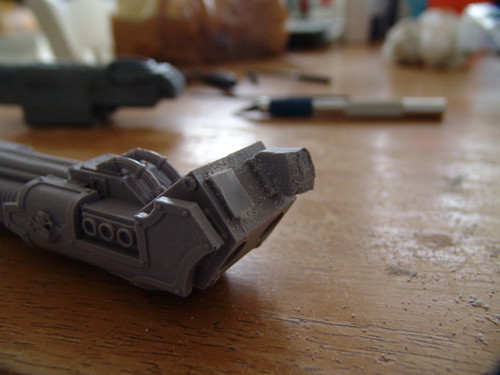
Couple of issues at this point, the center toe piston needed glued tight
to its housing and even the top of the casing needed some trimming to get
it to fit:

With the toe angle worked out (endless dry fitting) I attached/pinned the
toes to the foot:

Issue two, the smaller toe pistons. With the toes at this angle the pistons
are two short. I went ahead and glued the pistons on but will be snipping
the thin bottoms and replacing them with metal rods:

weekend so I could not work on it as much as I wanted to,
I also have a game of 40K next Saturday so we'll see how
it goes.
Well with this foot I kept up my pinning, but with the
angle I used I ran into pinning issues where I was drilling
into existing pins.
This was the toe pin:
So when I put this pin in I hit the toe pin:

To solve it I moved the center pin on the toe to the edges:

With the pinning worked out I could position my toes. Mind you that
a lot of dry fitting went into the planning.
Couple of issues at this point, the center toe piston needed glued tight
to its housing and even the top of the casing needed some trimming to get
it to fit:

With the toe angle worked out (endless dry fitting) I attached/pinned the
toes to the foot:

Issue two, the smaller toe pistons. With the toes at this angle the pistons
are two short. I went ahead and glued the pistons on but will be snipping
the thin bottoms and replacing them with metal rods:
Monday, February 8, 2010
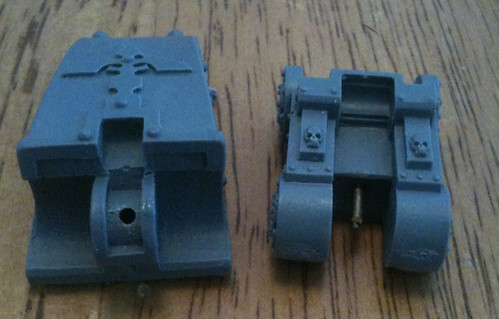
What cha doin with your feet son?
These dang feet need Nike's, what a pleasure and pain it is
dealing with them.
I went ahead and glued the toe joins to the foot base instead of
building them with the toe so I had more support when I glued
them for pinning.


I would highly suggest dry fitting everything and playing around
with different configurations to get a feel. Once you decide on
the foot's form its real important to pin for some added
support.
For this foot I went flat to add some support to the whole model.


dealing with them.
I went ahead and glued the toe joins to the foot base instead of
building them with the toe so I had more support when I glued
them for pinning.
I would highly suggest dry fitting everything and playing around
with different configurations to get a feel. Once you decide on
the foot's form its real important to pin for some added
support.
For this foot I went flat to add some support to the whole model.

Sunday, February 7, 2010
Back to the Forge
Well its time I put pen to paper and get busy doing what I
intended this blog to be for; my titans.
I broke my Warhound back out and have decided to make this
month "Month of the hound" and I hope to have him at least
together this month.
Let me start with the cleaning and cutting. This process took
me about two hours. I decided to cut and sand all pieces that I
could so I could wash it all at the same time.
On some pieces clippers work fine:

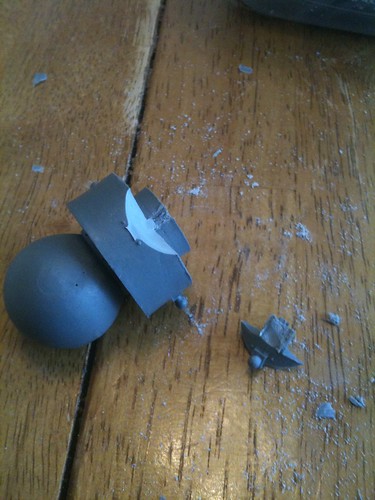
On others you need a razor saw:

And with resin you get breaks:

But with resin the break is clean, and after the panic has passed and cooler
heads prevail the fix is pretty easy:

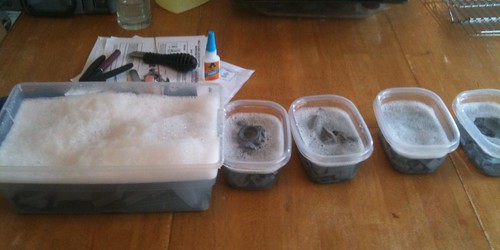
After all the bits are cut I clean them and separate them into plastic
storage bins, tip: do NOT put them back in the plastic bags, the bags
have resin dust and residue, you will have to clean them again.


This also allows you to separate by area, such as all the foot pieces in one,
legs in another and arms in yet another. With a project this big with this
many pieces its important to stay organized.
intended this blog to be for; my titans.
I broke my Warhound back out and have decided to make this
month "Month of the hound" and I hope to have him at least
together this month.
Let me start with the cleaning and cutting. This process took
me about two hours. I decided to cut and sand all pieces that I
could so I could wash it all at the same time.
On some pieces clippers work fine:

On others you need a razor saw:
And with resin you get breaks:
But with resin the break is clean, and after the panic has passed and cooler
heads prevail the fix is pretty easy:

After all the bits are cut I clean them and separate them into plastic
storage bins, tip: do NOT put them back in the plastic bags, the bags
have resin dust and residue, you will have to clean them again.

This also allows you to separate by area, such as all the foot pieces in one,
legs in another and arms in yet another. With a project this big with this
many pieces its important to stay organized.
Saturday, February 6, 2010
To Hell(hound) and back
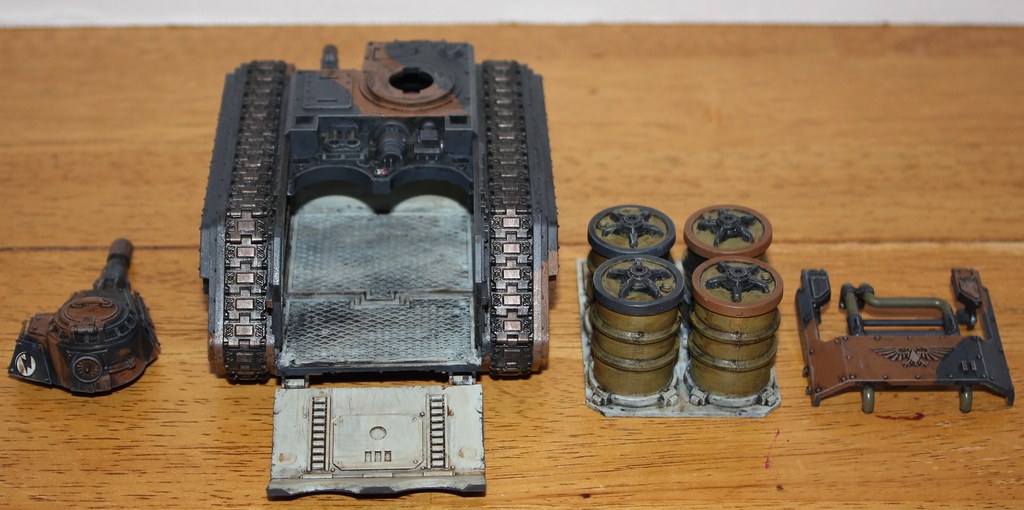
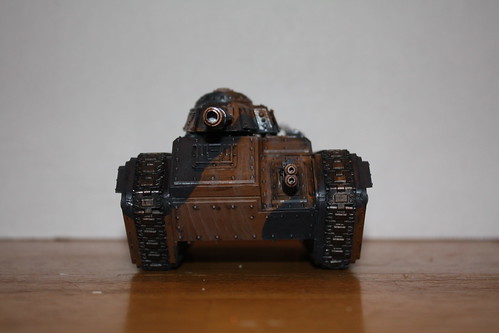
Picked up the new Hellhound kit, it was a joy to build and
covered in little detail's. I wanted to try to move my hand painted
camo job from the Sent's over to some treads before using my
airbrush incase the airbrush did not work out. I like how it turned out
but am still itching to use my airbrush.
15th Infantry Support Regiment;
225th Hellhound Platoon;
Blue Squadron.
Same as my Sent's; a black undercoat and a heavy coat of German Gray (Vallejo)
I then taped it off with Tamiya tape and gave it a brushing of Calthan Brown.
After it was dry I gave it a coat of floor wax.
Once dry I applied the decals using Micro Sol and Set and when
dry I used floor wax just over decals once more.
I then used Winston oil paint black and burnt umber (brown)
for weathering and oil stain.
This time around I used Dull Coat, much better then the
GW stuff.

Subscribe to:
Posts (Atom)